Hyundai Santa Fe Forums banner

Bumper duct covers to LED DRL/Turn upgrade/install.

1.1K views 15 replies 9 participants last post by  avionik99  
#1 · (Edited)
Image

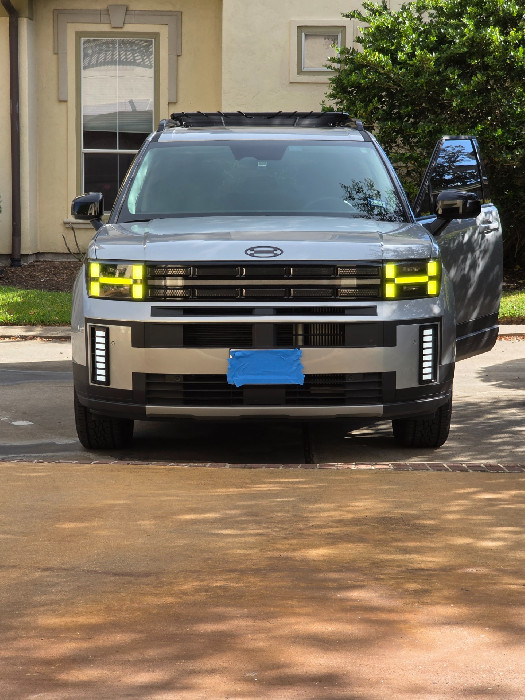
For those that want to see the DRL/Turn signal bumper duct lighting. Glossy black is the surround of the light just like the duct covers on my 25 Calligraphy. The red wire goes to the wire connected to pin 5 on the headlight harness. Yellow turn wire goes to the wire connected to pin 7 which is the side repeater + circuit. Black wire to the wire connected to pin 9 which is the ground for the headlight/turn assembly. The pins and connectors at the headlight/turn assemblies are identical for left and right.The lights draw about 400 milliamps on my test meter. A very low power draw to operate these. The actual light units protrude from the bumper about 8mm. The old "ducts" that these lights replace are a snap fit into the bumper. They are tightly snapped in with retaining tabs. You need to work from 1/3 way down on the side opposite the duct opening it has 3 tabs. Protect the paint with painters tape. Use a thin plastic pry/spudger tool to start with. Once the tool is in, use a larger pry tool in the opening working your way up. Once you get the first tab released and have room, use your fingers to pull outward, working your way around. The outboard tabs where the duct opening is will be like a hinge so open the duct cover like a door and pull outward at the same time. There is no need to disassemble the bumper at all. Just use proper tools to fit and pry the duct cover out. I usually recommend putting painters tape around the duct cover to prevent marring/scratching the bumper paint.
Image

Image

Image

Image
 
#15 ·
I have posted on reddit but also wanted to share here on the forum. I have found the OEM plugs for the headlights and made a plug and play harness. This eliminates the need to cut any factory wiring. The splicing is handled on the plug and play harness which acts as a passthrough.


heres an installation guide I also created for anyone that wants to do this and needs more clear instructions.

 
#16 ·
I have posted on reddit but also wanted to share here on the forum. I have found the OEM plugs for the headlights and made a plug and play harness. This eliminates the need to cut any factory wiring. The splicing is handled on the plug and play harness which acts as a passthrough.


heres an installation guide I also created for anyone that wants to do this and needs more clear instructions.

Great job and very nicely done! Thanks for that!
 
#7 ·
Image


Here's the other side, same issue. Gap on the vent side. Mine is a 2024 ICE Calligraphy. I didn't see any designation of left side or right side on the lights, which is about the only thing you can do wrong (if it matters it would be marked unless I missed it).

Unless somebody has a trick, I will decide to either keep them and seal the gap or return them.
 
#5 ·
Looks awesome! How did you connect the wires? I see at the connector there are seals. Based on your description I assume you put pin terminals on the red and black wires (like on the yellow) and inserted into the connector?

I wasn't able to find a pinout diagram, so I was going to probe the wires. You saved me a lot of work!